
Introduction
For those of you who are new to using a Linux terminal system, it is important to learn about the basic shell commands that help you navigate and interact with the terminal. A terminal is a text-based user interface that lets the user interact with and run a shell. A shell is a program that can process commands and return an output. When accessing the Intel® DevCloud we use an SSH client terminal, which is software that uses SSH protocol to connect to a remote computer, or in this case a server; the Intel DevCloud. To navigate and work with files on the Intel DevCloud it is important to have a basic knowledge of the different shell commands that enable you to do so.
File and Directory Commands
When entering all commands, remove the square brackets [ ] and replace the -options with the option you want to use, and replace the file/directory names with your own specific file or directory name.
Make Directory Command
This command is used to create a new directory.
Syntax:
mkdir [-option] [directory-name]Useful Options:
-m: To set file modes/permissions for the created directories
-p: To create parent directories
-v: To display a message for every directory created
Create a File Command
This command is used to create an empty file. To create and edit a file in the default text editor Vi, reference the vi command tutorial.
Syntax:
touch [-option] [file-name]Useful Options:
-a: To change/update the last access times of a file
-c: To check whether or not a file is created
-t: To create a file at a specified time
Remove Directory Command
This command will remove a directory if the directory is empty.
Syntax:
rmdir [-option] [directory-name]Remove Command
This command is used to remove objects such as files, symbolic links, and more.
Syntax:
rm [-option] [file-name]Useful Options:
-f: To forcibly remove a file
-i: For interactive removal where the system warns the user before removing each file
-r: For recursive deletion to delete all files in a directory tree including subdirectories
Copy Command
This command copies files and directories from the source path to a destination path.
Syntax:
cp [-option] [source-file] [destination-file]Useful Options:
-b: To create a backup of the destination file in the same folder with a different name and format
-f: To force the copy procedure by removing the destination file
-i: For interactive copying where the system warns the user before overwriting the destination file
-r: To copy a directory recursively
-u: To copy only if source file is updated or newer than the destination file
Move Command
This command works similarly to the copy command except instead of keeping the source file/directory it deletes it and is now only contained in the destination file/directory.
Syntax:
mv [-option] [source-file] [destination-file]useful Options:
-b: To create a backup of the destination file in the same folder with a different name and format
-f: To force the move procedure by overwriting the destination file and forcibly deleting the source
-i: For interactive moving where the system warns the user before overwriting the destination file
-n: To prevent an existing file from being overwritten
-u: To copy only if source file is updated or newer than the destination file
Terminal Navigation Commands
Changing the Directory
This command can be used in several different ways to navigate through directories.
Syntax:
cd [directory-name]To navigate back to your home directory from your working directory:
cdFor directories with white spaces in the directory name:
cd [directory name]To move inside a directory from a directory:
cd [directory-name1/directory-name2/directory-name3]To move up to the containing directory:
cd ..To move back to the previous directory:
cd -List Command
This command can be used to list directory contents of files and other directories on the Intel DevCloud.
Syntax:
ls [-option]Useful Options:
-a: To show all files/directories including hidden ones (prepended with a “.”)
-l: To show a long list of information about that file/directory
-t: To display files by modification time where the last edited file is displayed first
Show Working Directory
This command prints the path of the working directory starting from the root.
Synatx:
pwdCreating a Link Between Files
This command is used to create a link between files.
Syntax:
ln [-option] [file-name1] [file-name2]Useful Options:
-f: To forcibly remove existing destination files
-i: To prompt the user whether to remove destinations
-p: To create a hard link directory to a symbolic link
-r: To create a symbolic link relative to the link location
-s: To create a symbolic link instead of a hard link
-t: To specify a target directory of where to create the links
Displaying File Content Commands
Displaying a File Command
This command is used to read data from a file and display the contents as the output.
Syntax:
cat [-option] [file-name]Useful Options:
-n: To display files with the line numbers included
-s: To supress empty lines in the output
-E: To display a highlighted portion at the end of the line
Displaying More of a File
This command is also used to view files in the command prompt by displaying one screen at a time while allowing the user to scroll up and down through the page. This command gives you several options of how you want to display the content.
Synatx:
more [-options] [+/string] [+line-number] [file-name]Examples:
Options: How you want the file to be displayed (see the Useful Options section).
more -c file-name.txtString:To search for a string in the file and allows you to navigate through all instances of that string. For example, say you are searching for the word cat in your text file:
more +/cat file-name.txtLine Number: To display lines only after a specified line number. Say you want to see all the lines after line 15 in the file:
more +15 file-name.txtFile Name:The name of the file you want to be displayed:
more file-name.txtUseful Options:
-c: To display each screen from the top and clear the remainder of each line as displayed
-d: To prompt the user with “Press space to continue and ‘q’ to quit”
-p: To clear the screen before displaying the text
-s: To squeeze multiple blank lines into one blank line
-t: To not wrap long text lines in the file display
-u: To omit underlines
Displaying Less of a File
This command is like the “more” command, but instead of displaying the entire file, it displays the file by page.
Synatx:
less [-option] [file-name]Useful Options:
-E: To automatically exit when reaching the end of the file
-f: To force a non-regular file to be opened
-g: To highlight the string that was found by the last search command
-G: To suppress highlighted strings found by search commands
-i: To ignore the case, making the file display as not case sensitive
-n: To suppress line numbers
-p: To tell less to start at the first occurrence of a pattern in the file
-s: To squeeze multiple blank lines into a single blank line
Printing the Head of a File
This command prints the top or head of the file given a specified input.
Syntax:
head [-option] [file-name]Useful Options:
-c: To print the first number of bytes in a specified file
Example:
head -c 15 file-name.txt-n: To print the top n number of lines in a specified file
Example:
head -n 10 file-name.txt-q: To display multiple files if more than one is given
Example:
head -q file-name.txt file-name2.txt-v:To display data after file name is listed first.
Example:
head -v file-name.txtPrinting the Tail of a File
This command prints the bottom or tail of the file given a specified input.
Syntax:
tail [-option] [file-name]Useful Options:
-c: To print the last number of bytes in a specified file
Example:
tail -c 15 file-name.txt-fTo output appended data as a file grows
Example:
tail -f file-name.txt-nTo print the bottom n amount of lines in a specified file
Example:
tail -n 10 file-name.txt-q: To display multiple files if more than one is given
Example:
tail -q file-name.txt file-name2.txt-v: To display data after file name is listed first
Example:
tail -v file-name.txtSorting and Searching Data File Commands
Pattern Search Command
This command searches through a file for a specified pattern of characters and displays the lines that contain the pattern.
Synatx:
grep [-option] [“pattern”] [file-name]Useful Options:
-c: To display the number of lines that match the specified pattern in a file
-h: Displays matched lines but not filenames
-i: To make the file ignore case so they read capital and lower-case letters in the same way
-l: Displays all the files containing the specified pattern
-n: Displays matched line where a pattern is contained and their line numbers
-w: To match an entire word
-o: To display only the matching pattern (not the entire line where the string is contained)
Sort a File Command
This command is used to sort through a file by arranging the file in a specific order.
Syntax:
sort [-option] [file-name]Useful Options:
-c: To check whether or not a file is already sorted
-k: To sort by column number (for example, sort k 2n file-name.txt)
-n: To sort a file numerically
-o: To output sort results to a new file
-r: To sort a file in reverse order
-u: To sort and remove duplicates from a file
Word Count Command
This command is used to count the number of lines, words, bytes, and characters in a specified file on the Intel DevCloud.
Syntax:
wc [-option] [file-name]Useful Options:
-c: Displays the byte count
-l: Displays the newline count
-L: Prints the length of the longest (character count) of a line in a file
-m: Displays the character count
-w: Prints the word count
Cut Command
This command is used for cutting out parts of a line by bytes, characters, and fields.
Syntax:
cut [-option] [file-name]Useful Options:
-b: Cuts out only the specific bytes
-c: Cuts out only specific character
-d: To use a delimiter instead of a tab as the delimiter
-f: To cut only a selected field and print any line containing no delimiter
File Permission Commands
Change Access Mode to a File
This command is used to change the access mode of a file.
Syntax:
chmod [reference] [operator] [permissions] [file-name]Useful Options::
Reference:
u: The file’s owner
g: The users who are members of that file’s group
o: Others - The users who are not the files’ owner or part of the files group
a: All - All three references (u, g, o)/p>
Operator:
+: Adds specified permissions to the file
-: Removes specified permissions to the file
=: Permissions are to be exactly the same as the file
Permissions:
r: Permission to read the file
w: Permission to write or delete the file
x: Permission to execute the file
Change the Owner of a File
This command is used to change the owner of a file.
Syntax:
chown [-option] [new-owner:new-group] [file-name] More Commands and Options
Displaying the User Manual
This command is used to display the user manual for any and all commands and options. For more information on the commands that we have covered in this guide and commands we did not cover, please reference the user manual.
Syntax:
man [-option] [command name]Useful Options::
-a: To display all available manual pages
-f: To check whether a command is present
-k: To search a command as a regular expressio
-w: To return the page location of where a given command is present
Graphics Usage on the FPGA Devcloud
In order to run GUI based applications such as Quartus and Modelsim, you will need to download an application on your PC called X2Go. X2Go is the remedy for slow graphics response from X11 based windowing systems.
To download X2Go, navigate to this link on your PC browser: https://wiki.x2go.org/doku.php/download:start
We have verified the MS Windows version – click where the cursor is in the screenshot below (mswin):
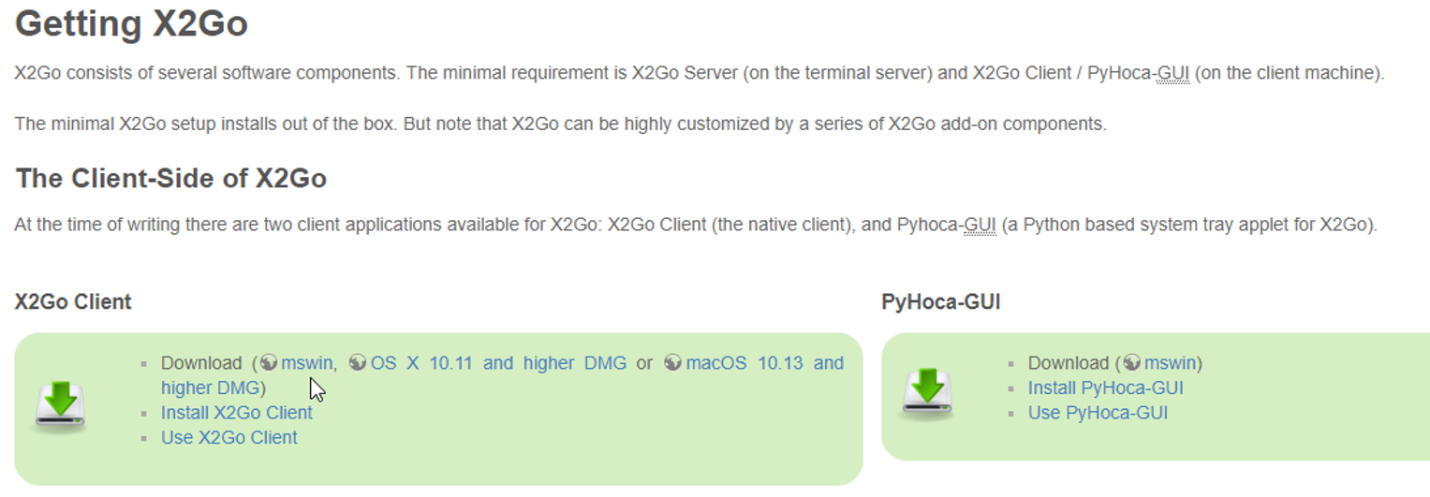
Go through the install steps for the mswin X2Go Client and accept all.
Opening Port for Graphics Usage in X2Go
From the login-2 node on your terminal, you will need to open a communication port between the compute node and the X2Go service. Then you can launch the X2Go application.
First login to a compute node from login-2 from your terminal.
This is accomplished with a ssh command of the form:
qsub -q batch@v-qsvr-fpga -I -l nodes=s001-n137:ppn=2 This will login to compute node s001-n137 in interactive node. Use pbsnodes to find a compute node with the appropriate properties to accomplish your compilation and hardware needs. X2Go capable machines have an X2Go property tag.
Use this command on your compute node to make sure the X2Go software is running on your compute node:
systemctl status x2goserveBack on your host node (your PC or Linux system), open up the port to allow access from X2Go to your compute node:
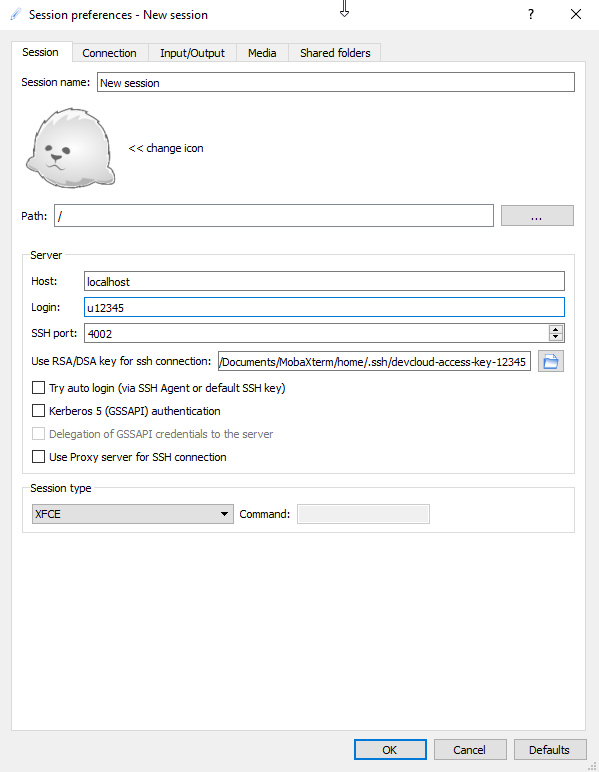
ssh -L 4002:s001-n137:22 devcloudLaunch the x2go application on your PC. Set up the new session with the following settings substituting the Login field with your own assigned user name and the path to the RSA/DSA key for ssh connection.
This is the same key referenced for MobaXterm connection that enables ssh devcloud.
The input/output screen has a setting for the display size which can be adjusted depending on your screen size. Adjust the parameters on this panel to change to a different screen size.
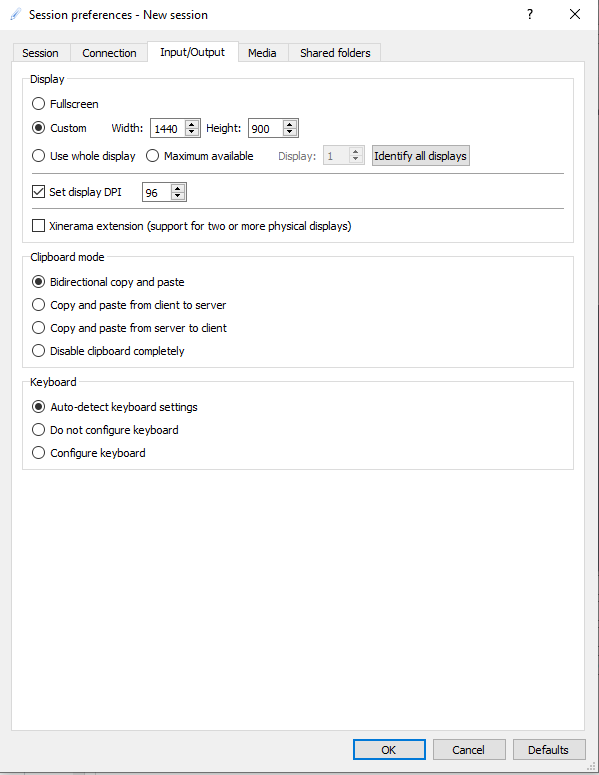
To launch the application, hit OK to save the settings and then click on the New Session icon to launch a graphics session.
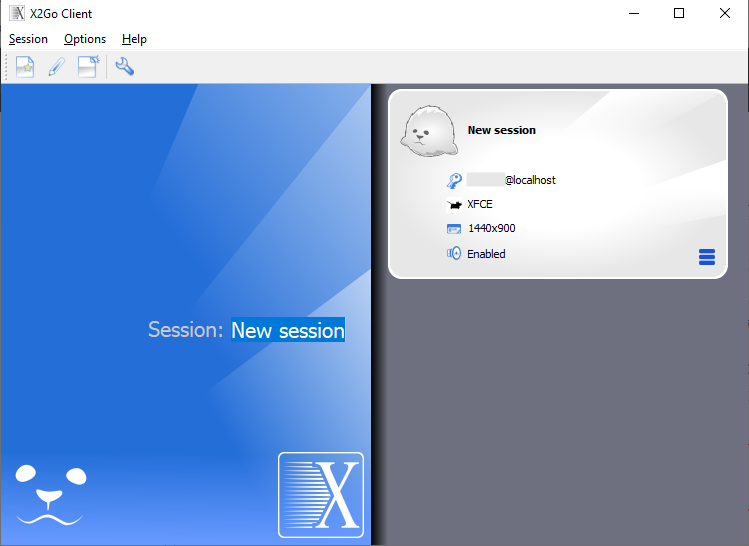
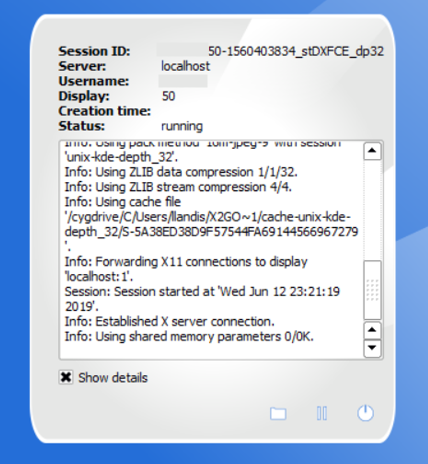
After a minute or so, you should see the X2GO screen, be patient. While waiting for X2GO to launch you will see a screen that looks like this:
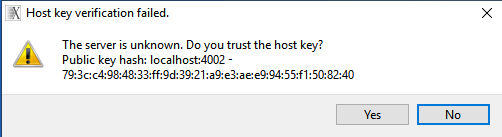
Click Yes when the following window pops up.
You might get the following message if you previously logged into a different machine:
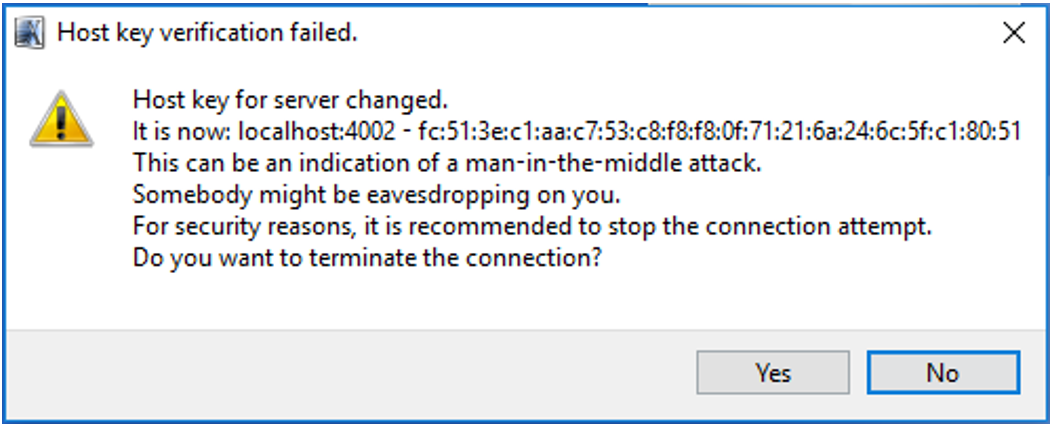
Enter No.
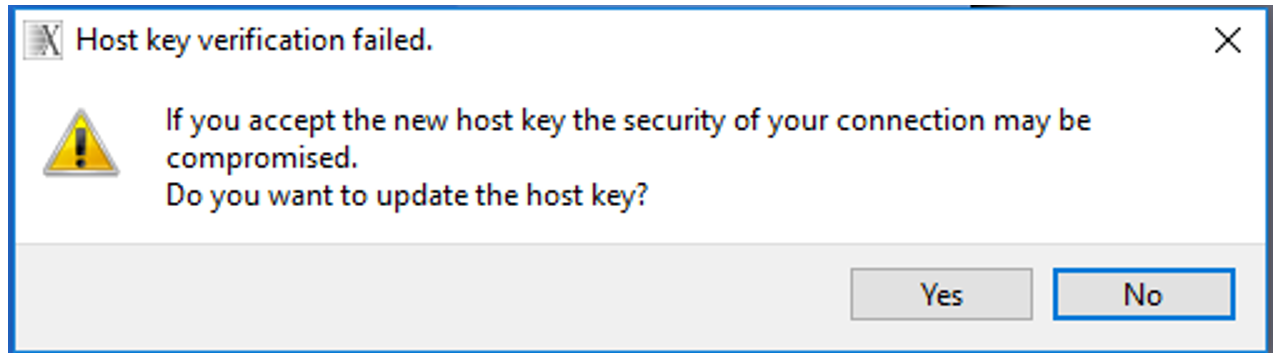
Then another dialog box will appear, enter Yes,
You will see a window that looks like the following. If a window opens up, click Default.
Troubleshooting
If X2GO fails to launch, check that you ran the ssh tunneling command on your local host.
If you still aren't able to launch X2Go, temporarily disable your firewall (eg. McAfee) before launching a new X2Go graphics session.
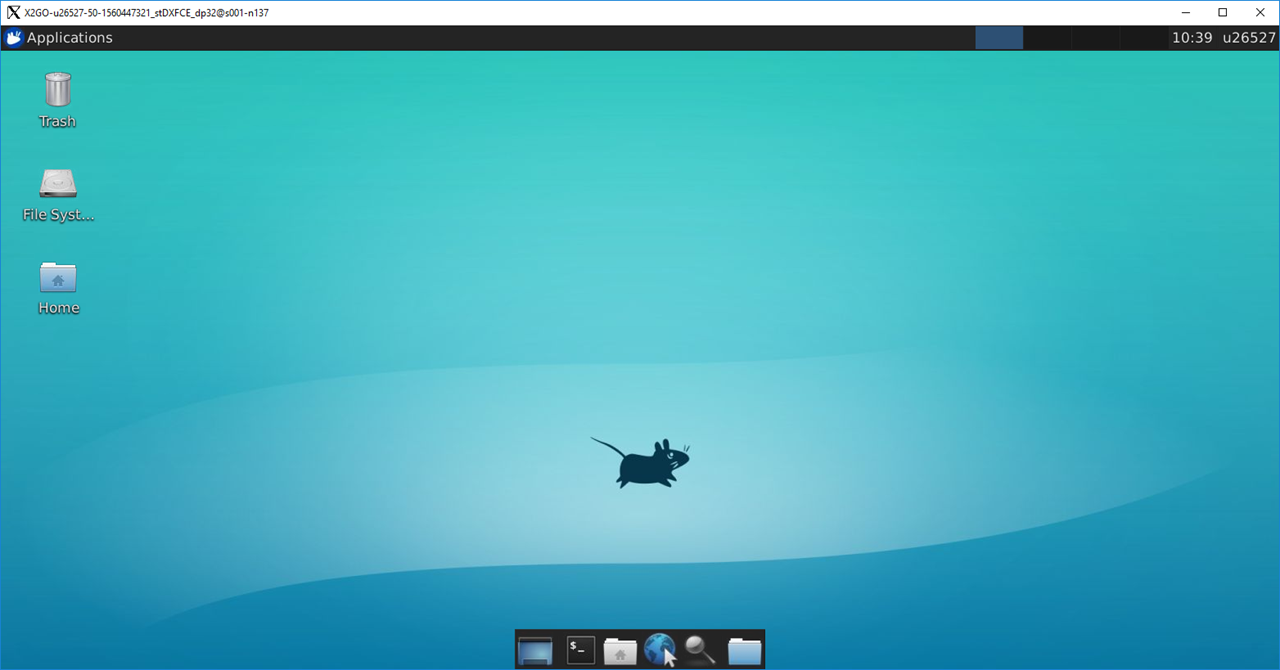
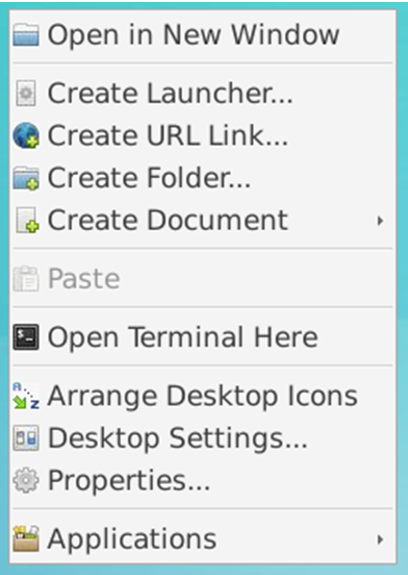
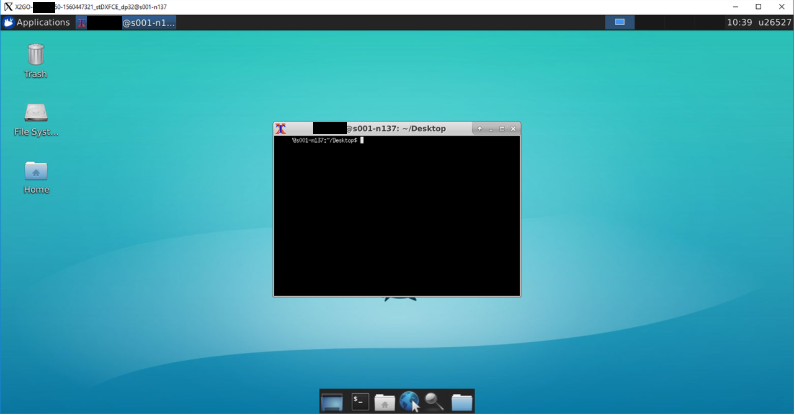
In X2GO, right click within the desktop and select “Open Terminal Here”.
Your GUI ready environment should be similar to the following image:
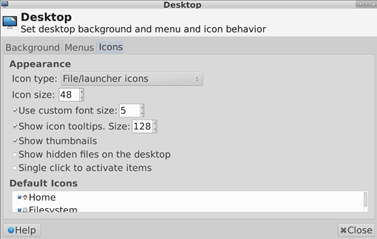
To change the font sizing of the Desktop files in Desktop Settings under the Icons tab. Select “Use custom font size” and change it to 5 or to your font size preference.
Quartus Font Setup
Note, for any GUI based activity you need X2Go running. Based on network activity GUI response could be considerably slower speed than when running on a local PC. Try to structure your project to use batch commands for faster response through the terminal.
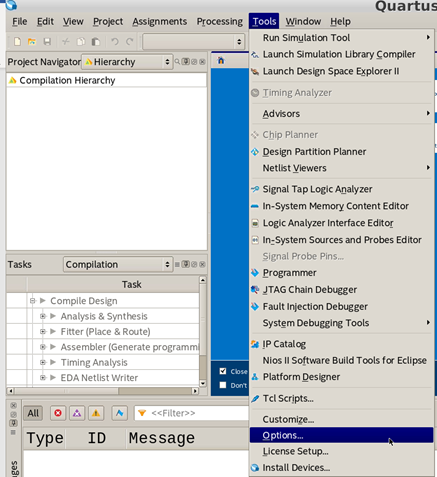
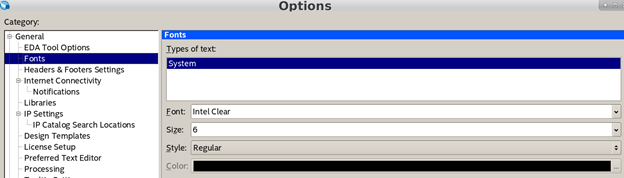
If the Quartus font appears too zoomed in, as shown below, complete the following:
Under the Tools tab on the Main Bar, select Options. In the General Category, select “Fonts” and change the text size to 6.
New Batch Mode Tutorials
New Arria10 Open Cl
-
Batch Submission
The batch script attached above can be used to launch the OpenCL emulation flow, followed by the compilation and FPGA board programming flow using aocl commands. Adjust commands within the script to your own needs.
From the headnode login-2, run this command:
To see the resulting terminal output, consult the files:qsub -q batch@v-qsvr-fpga -l nodes=arria10:ppn=2 -d . A10_oneapi_batch.sh
A10_v1.2.1_opencl_batch.sh.exxxxxx
A10_v1.2.1_opencl_batch.sh.oxxxxxx
xxxxxxx is a unique job ID. The .exxxxxx file is the error log and the .oxxxxxx file is the terminal log where success or failure of the commands can be determined. Note that log files dont get updated until the end of the job. -
Interactive Walkthrough
If you are new to the Arria 10 GX PAC card with OpenCL, check out this quick start guide:
https://www.intel.com/content/dam/www/programmable/us/en/pdfs/literature/ug/ug-qs-ias-opencl-a10.pdf
Note: As of March 30, 2021, the prior version of Arria 10 PAC v1.2 is no longer supported.
Note: Please use batch mode whenever possible
This demonstration will step the user through the following steps:
- Select appropriate compute node machine on the FPGA devcloud
- Load the appropriate tools
- Copy over the sample OpenCL design
- Take the sample design and compile for emulation mode (kernels will run on the CPU)
- Compile the application software using the gcc C compiler
- Execute in emulation mode
- Convert the OpenCL code to RTL and into an FPGA executable
- Download the OpenCL FPGA bitstream to the PAC card
- Run the application software on the host and show that the host CPU and FPGA interact to solve heterogenous workloads. Results should be comparable to emulation mode, with improved throughput.
-
Assumptions
This lab assumes the following:- Basic FPGA knowledge
- Basic OpenCL knowledge
- Intel Devcloud registration and SSH key set up
- MobaXterm installed and set up, X2Go optional
-
Walkthrough
-
Initial Setup
This will bring up a list of available open cl nodes on the fpga. Look for a node that has the “arria” property as well as a state of “state=free”. Keep track of the node name.pbsnodes -s v-qsvr-fpga
Open an interactive session with
or to have qsub find you an appropriate node runqsub -q batch@v-qsvr-fpga -I -l nodes=*node_name*:ppn=2
Once on this node, run the commandsqsub -q batch@v-qsvr-fpga -I -l nodes=arria10:ppn=2
Make working directorysource /glob/development-tools/versions/fpgasupportstack/a10/1.2.1/intelFPGA_pro/hld/init_opencl.sh source /glob/development-tools/versions/fpgasupportstack/a10/1.2.1/inteldevstack/init_env.sh export FPGA_BBB_CCI_SRC=/usr/local/intel-fpga-bbb export PATH=/glob/intel-python/python2/bin:${PATH}
We will then copy the example folder into this project folder.mkdir A10_OPENCL_AFU
Type this into the terminal:
Check to make sure connectivity to the Arria 10 PAC card looks ok:cp -r /opt/intelFPGA_pro/quartus_19.2.0b57/hld/examples_aoc/hello_world A10_OPENCL_AFU cp -r /opt/intelFPGA_pro/quartus_19.2.0b57/hld/examples_aoc/common A10_OPENCL_AFU cd A10_OPENCL_AFU
Look for DIAGNOSTIC_PASSED.aocl diagnose
-
Running OpenCL in emulation mode
The first step of the OpenCL flow is to compile and execute the design for emulation mode. This step allows you to quickly verify the functionality of your code on the CPU without performing the conversion from OpenCL to RTL and from RTL to an FPGA executable, which takes up to an hour.
The next step is to compile the host code. Note: use make clean followed by make to force a recompile.cd hello_world aoc -march=emulator -v device/hello_world.cl -o bin/hello_world_emulation.aocx ln -sf hello_world_emulation.aocx bin/hello_world.aocx
Now run for the host code binary. Note that the with the environment setting shown, the host code knows the .aocx file is for emulation execution on the CPU and not on the FPGA card.make
For version 1.2.1, you need to run emulation with this command:
You should see a list of parameters and Kernel execution is complete../bin/host -emulator
-
Compiling OpenCL code into an FPGA executable
Now that you have emulated your design, you can run the steps to convert OpenCL to RTL, which will subsequently get compiled in Quartus to produce an FPGA executable .aocx file using the following command. This step will take approximately one hour.
aoc device/hello_world.cl -o bin/hello_world_fpga.aocx -board=pac_a10 -
Converting the 1.2.1 version of .aocx to an unsigned .aocx file
Because no root key or code signing key is provided, the script asks if you would like to create an unsigned bitstream, as shown below. Type Y to accept an unsigned bitstream. No root key specified. Generate unsigned bitstream? Y = yes, N = no: Ycd bin source $AOCL_BOARD_PACKAGE_ROOT/linux64/libexec/sign_aocx.sh -H openssl_manager -i hello_world_fpga.aocx -r NULL -k NULL -o hello_world_fpga_unsigned.aocx
No CSK specified. Generate unsigned bitstream? Y = yes, N = no: Y
-
Downloading the bit stream into the PAC card
The executable that you run on the FPGA on the PAC card is called an .aocx file (Altera OpenCL executable).
To see what FPGA accelerator cards are available, we type the following into the terminal.
You will observe the pac_10 board is available. Next, as you did during the initial step, run the aocl diagnose command so that you can get the device name.aoc --list-boards
Observe that the device name is acl0.aocl diagnose
Next, you need to create the unsigned version of the .aocx file.
-
Programming the Arria 10 GX PAC Card
Next, you will program the PAC card with hello_world_fpga_unsigned.aocx (version 1.2.1) FPGA executable with one of the following commands:
aocl program acl0 hello_world_fpga_unsigned.aocx -
Running the host code
You have already run make to build the CPU host executable in the prior section, so it's not necessary to compile the host code again. Simply run the following command to run a heterogeneous workload that combines CPU and FPGA execution to utilizing the CPU and FPGA working in tandem.
./host
-
Initial Setup
New Stratix 10 Open CL
-
Batch Submission
The batch script attached above (in this case S10_opencl_batch.sh) can be use to launch the OpenCL emulation flow, followed by the compilation and FPGA board programming flow using aocl commands. Adjust commands within the script to your own needs.
From the headnode login-2, run this command:
To see the resulting terminal output, consult the files:qsub -q batch@v-qsvr-fpga -l nodes=darby:ppn=2 -d . S10_opencl_batch.sh
S10_opencl_batch.sh.exxxxxx
S10_opencl_batch.sh.oxxxxxx
xxxxxxx is a unique job ID. The .exxxxxx file is the error log and the .oxxxxxx file is the terminal log where success or failure of the commands can be determined.
-
Interactive Walkthrough
If you are new to the Stratix 10 PAC card with OpenCL, check out this quick start guide:
https://www.intel.com/content/www/us/en/programmable/documentation/qgu1548972652523.html
This demonstration will step the user through the following steps:
- Select appropriate compute node machine on the FPGA devcloud
- Load the appropriate tools
- Copy over the sample OpenCL design
- Take the sample design and compile for emulation mode (kernels will run on the CPU)
- Compile the application software using the gcc C compiler
- Execute in emulation mode
- Convert the OpenCL code to RTL and into an FPGA executable
- Download the OpenCL FPGA bitstream to the PAC card
- Run the application software on the host and show that the host CPU and FPGA interact to solve heterogenous workloads. Results should be comparable to emulation mode, with improved throughput.
-
Assumptions
This lab assumes the following:
- Basic FPGA knowledge
- Basic OpenCL knowledge
- Intel Devcloud registration and SSH key set up
- MobaXterm installed and set up, X2Go optional
-
Walkthrough
-
Initial Setup
Run
This will bring up a list of available open cl nodes on the fpga. Look for a node that has the “darby” property as well as a state of “state=free”. Keep track of the node name.pbsnodes -s v-qsvr-fpga
Open an interactive session with
or to have qsub find you an appropriate node runqsub -q batch@v-qsvr-fpga -I -l nodes=*node_name*:ppn=2
Once on this node, run the commandsqsub -q batch@v-qsvr-fpga -I -l nodes=darby:ppn=2
Make working directorysource /glob/development-tools/versions/fpgasupportstack/d5005/2.0.1/inteldevstack/init_env.sh source /glob/development-tools/versions/fpgasupportstack/d5005/2.0.1/inteldevstack/hld/init_opencl.sh export FPGA_BBB_CCI_SRC=/usr/local/intel-fpga-bbb export PATH=/glob/intel-python/python2/bin:${PATH}
We will then copy the example folder into this project folder. Type this into the terminal:mkdir S10_OPENCL_AFU
Check to make sure connectivity to the Stratix 10 PAC card looks ok:cp $OPAE_PLATFORM_ROOT/opencl/exm_opencl_hello_world_x64_linux.tgz S10_OPENCL_AFU cd S10_OPENCL_AFU tar xvf exm_opencl_hello_world_x64_linux.tgz
Look for DIAGNOSTIC_PASSED. For the specific test on the installed board, use:aocl diagnose
Note that this shows a board name is pac_s10_dc. You will need this for a subsequent step.aocl diagnose acl0
-
Running OpenCL in emulation mode
The first step of the OpenCL flow is to compile and execute the design for emulation mode. This step allows you to quickly verify the functionality of your code on the CPU without performing the conversion from OpenCL to RTL and from RTL to an FPGA executable, which takes up to an hour.
The next step is to compile the host code. Note: use make clean followed by make to force a recompile.cd hello_world aoc -march=emulator -legacy-emulator device/hello_world.cl -o bin/hello_world_emulation.aocx ln -sf hello_world_emulation.aocx bin/hello_world.aocx
Now run emulation with the host code binary. Note that the with the environment setting shown, the host code runs the .aocx file for emulation execution on the CPU and not on the FPGA card.make
You should see a list of parameters and Kernel execution is complete.CL_CONTEXT_EMULATOR_DEVICE_INTELFPGA=1 ./bin/host
-
Compiling OpenCL code into an FPGA executable
Now that you have emulated your design, you can run the steps to convert OpenCL to RTL, which will subsequently be compiled in Quartus to produce an FPGA executable .aocx file. This step will take approximately one hour.You can also copy or link over a prebuilt copy of the .aocx file from $OPAE_PLATFORM_ROOT/opencl/hello_world.aocx .
aoc device/hello_world.cl -o bin/hello_world_fpga.aocx -board=pac_s10_dc ln -sf hello_world_fpga.aocx bin/hello_world.aocx -
Downloading the bit stream into the PAC card and running the host code
Similar to the prior step of running bin/host, but without the environment variable setting.
Run the following:
aocl program acl0 bin/hello_world.aocx
./bin/host
-
Initial Setup
Conclusion
This article displayed basic shell commands and options for navigating and interacting with the Intel DevCloud terminal. Refer to this guide while using shell commands on the Intel DevCloud. For more information related to navigation of the Intel DevCloud, refer to the following additional resources section.